- Continue Shopping
- Your Cart is Empty
Kitty PJ Pillow Tutorial
I recently made a PJ stuffy for my niece using the Melly & Me Wild Flower Meadow panel. You can find the post here. I decided to make something similar for her sister so, I came up with the Kitty PJ Pillow. It has a small pillow insert with enough room to stuff her PJ's in. I didn't want to reinvent the wheel so, I used Purlsoho free City Gym Short Tutorial, and made two coordinating pj shorts.

Materials Used for PJ Pillow:
1/2 yard White Basic Shade by Riley Blake 200-03
Small pieces of Sketch in pink, nectar, charcoal, and yellow by Timeless Treasures
1/2 yard muslin
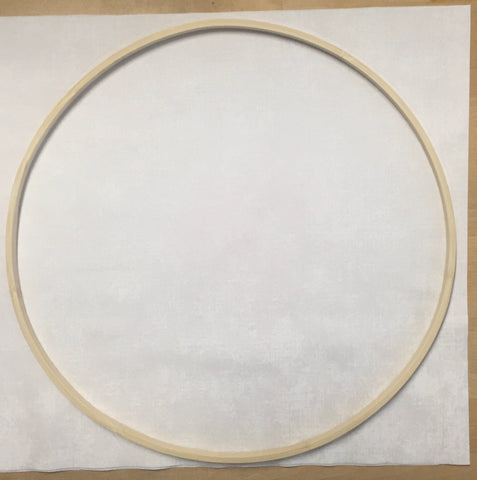
14" embroidery hoop
Pellon fusible double sided interfacing
Pellon fusible fleece
Stuffing
One pink Kam Snap
Step one:
Using the Embroidery hoop as a template, trace and cut out one 14" circle from the White Basic Shade by Riley Blake 200-03 and Pellon fusible fleece for the front of the pillow. Cut out two more for the back.
Step Two:
Cut 2" off one of the back circle pieces and the other circle in half. Double fold under straight edges so raw edges are not showing. Edge stitch across. Overlap both pieces to make a 14" circle, baste circles together where fabric overlaps, to hold in place. Position and instal snap about an inch from the edge. Set aside.
Step Three:
Fuse Pellon double sided interfacing to fabric that will be used for the kitties features. I used C8224-Pink for nose, C8224-Yellow for cheeks, C8224-charcoal for eyes and C1044 for inner ears. Cut out fabric that now has the interfacing on back, using the templates. I used a sharpie cap for the eyes.
Hint: I drew the lines and shapes of the face on separate pieces of paper and laid them underneath the fabric then traced them onto the fabric using a water soluble pen for perfect placement. Then I ironed the pieces in place. Fuse fleece to back side of the circle. Stitch the pieces in place using a blanket stitch. Use a satin stitch for the mouth and whiskers details.

Step Four:
Make the ears. Iron and stitch the inner ear fabric to the white outer ear fabric, just as you did for the face. With right sides together stitch the two straight sides together and flip right side out. Put a small amount of stuffing into opening and baste closed.
Step Five:
Position the ears in place by laying them face down on top of the front panel. With raw edges matching baste in place. Then with right sides facing, place and pin the back panel on top of the front panel. Stitch all the way around the circle. (I used a serger). Fold right side out and pillow cover is complete. 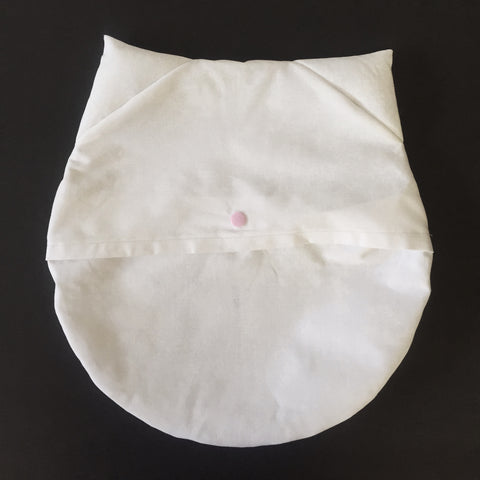
Step Six:
Make pillow insert. Cut two 14" circles out of muslin for the pillow insert. Stitch together leaving a 2" opening. Fold right side out and stuff just enough to give it substance so that, when the pillow does not have pj's in it, is still looks like a pillow. If you over stuff, there will not be room for the pj's. Stitch opening closed and place pillow insert into Kitty cover and you are done with the Kitty PJ Pillow!

PJ Shorts
Materals used:
2 yard each of Double Folded Crochet Trim 71416-5, 71416-71
1/2 yard each of C8224 Yellow and Nectar by Timeless Treasures
1/2 yard of C2925 Cute Cat Faces by Timeless Treasures
1/2 yard C1044 Mini Chevron Stripe in Beige by Timeless Treasures
1" Non roll elastic
Clip n Glide Bodkin
I included two pairs of City Gym Shorts for her to wear as PJ bottoms. I did not want to reinvent the wheel so, I used Purl Soho's free tutorial found here. I used Double Folded Crochet Trim or you could add mini pom pom fringe for added cuteness. I also used the same Sketch 8224 in yellow and nectar for the back of the shorts and C1044 Mini Chevron Stripe and C2925 Cute Cat Faces by Timeless Treasures for the front of the shorts. The Cute Cat Faces fabric by Timeless Treasures was the inspiration for this entire project. I hope this tutorial has inspired you!
